Building a Static Site With WordPress and Netlify
This is how I built a fully static website by using a combination of tools to streamline the process. There are going to be links for more in-depth explanations to each step.
Updates-
I have been using the same basic technique but I have moved to Laragon which has way better performance than Netlify.

Ingredients
- Local by flywheel
- WordPress
- Theme
- Wp-to-static plugin
- Netlify hosting with GitHub integration
First, let me explain why I went this route. I needed to get my photography site up extremely fast. I wanted a clean minimalist website with extremely fast load times hence the reason why I went static. I also needed something where most of the HTML and CSS was set up and on which I could do my own tweaks after the fact, as opposed to something like Jekyll, which is a bit more involved.
So, I needed a clean, basic, WordPress theme to use as my template. Another reason I needed a clean theme is so that it doesn’t completely break when I export it as a static site. I decided to go with Netlify since they offer extremely fast, static website hosting through GitHub, as well as really great tools and an easy to use interface.

I started out with Local by Flywheel which is a Local Dev Environment for WordPress that’s extremely easy to use, and here is a quick guide to get you started.
Next, I got the wp-static plugin, (no need for any other plugins), and then I set up GitHub and Netlify… Here’s a tutorial on how to do that.
As mentioned previously, I needed to find a theme that wouldn’t break when converted to Static-HTML. I quickly realized that I needed a theme that’s built only using HTML and CSS without any fancy additions, because the additions would break upon static export. I went through some of the usual theme directories but in the end, landed on this theme on GitHub. It worked straight out of the box statically and matched the aesthetic I was looking for. It also is an extremely well laid out theme in the programming department which helps an HTML and CSS noob like me.
Next, I went through and built the basic outline of the site using WordPress’s built-in tools. There are many great tutorials available, so I won’t cover that over here. I did some further customization by going through the theme editor in the appearance menu, which lets you go through each part of the of HTML and CSS.
I added social icons using Fontawesome.
I made a bunch of different changes in terms of font and scaling as well as customizing the footer, which I won’t bore you to death about here.
After that, I needed to find a lightbox plugin and a gallery plugin which would work with a static site. Again, I found that sticking to the simplest plugins available, was the way to go. After a lot of trial and error, I settled on the following two:
Wp-featherlight-for my photo lightbox
WP-Flickity-for my slider testimonial page, which I have not finished yet. They both use Jquery, for anyone who cares…
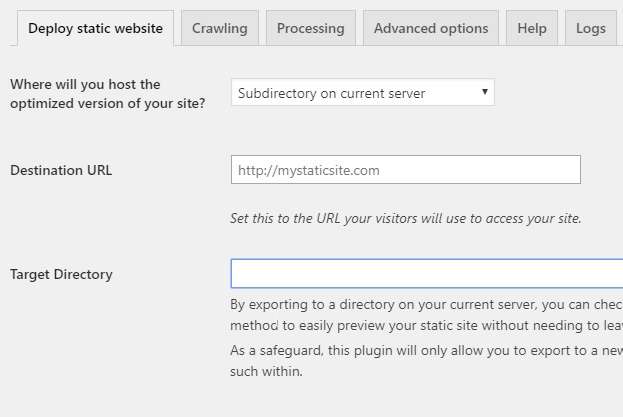
When testing each step and to publish the final product, I needed to export the site statically, through the plugin. There is a way to link your Netlify directly, but I wasn’t able to get it to work. Instead, I exported it to a zip file and then uploaded it to Netlify directly.
After you do this process a few hundred times and are happy with your site, you may want to add a custom domain. Here is the guide I used. Start from step 6.
And that’s it!! You should now be live. If you have any questions, comments, or suggestions, feel free to give me a holler. This is the site I built and I am currently working on another one, with the same workflow.
Member discussion