Ultimate culling workflow
Speed up your image culling workflow with Fast Raw Viewer. Optimize your culling workflow, with the fastest and cheapest culling process. This is a super simple article on how to optimize your culling workflow with Fast Raw Viewer.
Ingredients
Fast Raw Viewer
Programmable Mouse
Raw Files
Computer
Coffee
Why Fast Raw Viewer
So you guys may know from my previous post that Lightroom is unusable for culling. The other photo editors I have tried, like Capture One, On1 Photo Raw, and Photo Ninja are quite a bit faster, but they aren’t instantaneous. This is left to dedicated culling programs like photo mechanic and fast raw viewer.
I tried the trial for photo mechanic and couldn’t stomach the price even though its an incredible piece of software. So the search for alternatives began, and that’s when I stumbled upon the Fast Raw Viewer.
This is a piece of software that isn’t pretty to look at, however it’s speed and functionality are a top priority. I cannot explain how instantaneous it is to load and view raw files even in 100 percent zoom. You are just gonna have to try it yourself. It is equivalent or faster at loading raw files than most programs are at loading jpegs.
The second key piece this software has for culling is an option to show how much detail can be recovered in the shadows and highlights. This feature is incredible if your exposure is off or if you are comparing multiple images with different exposures in a High Dynamic Range situation.
And finally there’s an option to set sharpening and focus checking zebra patterns to find the sharpest images fast.
All in all the software lives up to its name, plus some.
Setup
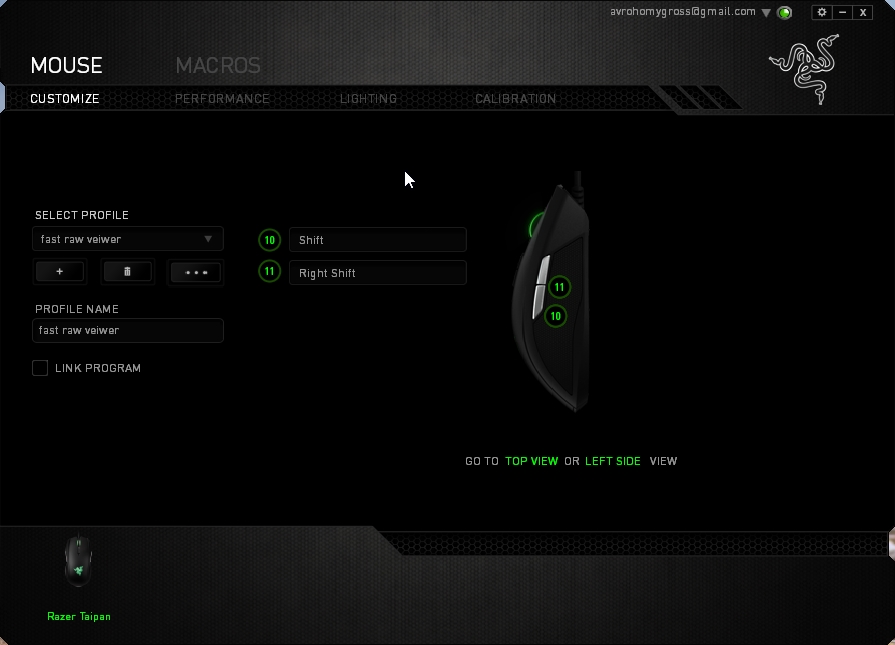
From there you want to program the buttons on your mouse to the hotkeys that you use most, which for me are the under and overexposure compensation.
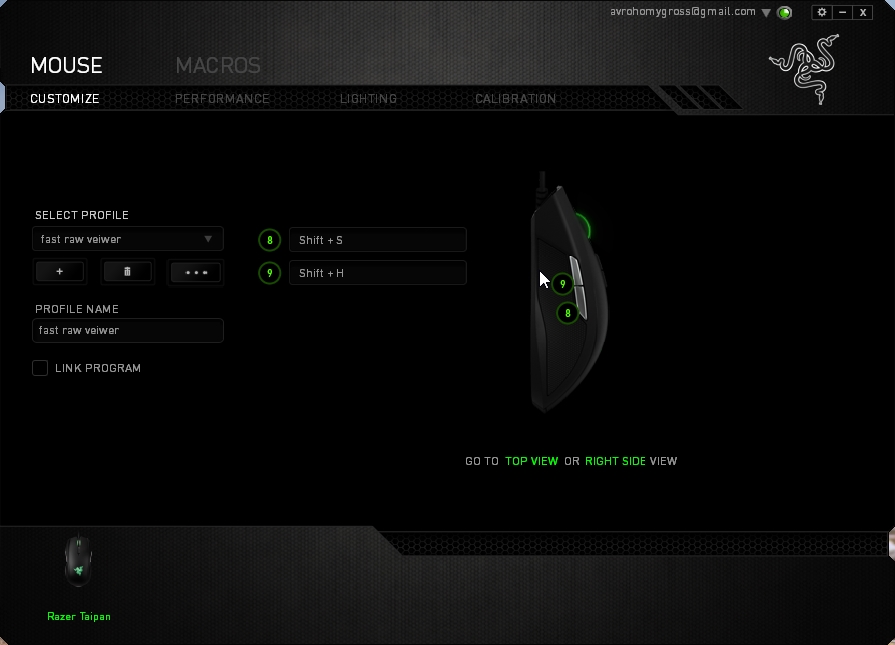
The other keys are set to shift, which shift left-click zooms into a 100 percent view. So whichever side button you push you will have shift allowing you to view at 100 percent.
Hit the S key twice to increase overall sharpening.
Spacebar should be set to the image. X is set to back,C to clear the label and V to green which is a pick in my label system.
So now I have one hand controlling label as reject or pick, as well as the back button to switch to the next image and my other hand controls 100 percent zoom, as well as under and overexposure compensation.
Remember when I rate or reject a picture it auto advances so I only need to use the back button in case I make a mistake.
Also, if you want to know how you can protect your data in a more secure way, Click here to read about the Backup Basics Guide, one way to protect your data.
Profit
Member discussion